A list of the adventure map structures in Heroes of Might and Magic IV.
Attribute modifier[]
| Name | Image | Description | Flavour Text |
|---|---|---|---|
| Arena | 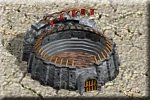
|
The hero gains +3 melee and ranged defense. | The instructor hands [hero] an old, dented shield and nothing else. Then the instructor pulls out a sword wrapped in cloth and says, "Try not to get hit!" An hour later, [hero] is a bit battered and bruised, but he/she has learned a little something about defense.
If visited after gaining the bonus: As much as the instructors would love to beat on you some more, they turn you away to give other inexperienced students the opportunity. |
| Buoy | 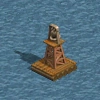
|
Provides +1 morale for the next battle that the hero fights. | |
| Faerie ring | 
|
Provides +1 luck for the next battle that the hero fights. | Not sure what to expect, you step into the Faerie Ring. Immediately, your worries disappear. You laugh and play with the childlike faeries, having such a great time that you never want to leave. Alas, the time comes for you to move on, but you feel a little luckier.
If visited after gaining the bonus: Sure, you enjoy frolicking with the Faeries, but you simply don't have the time to play right now. |
| Fountain of Fortune | 
|
Provides +1 luck for the next battle that the hero fights. | Those who toss a copper coin into a Fountain of Fortune are granted a temporary increase to their luck.
If visited after gaining the bonus: You could toss a fortune into this Fountain of Fortune, but it will not make you any luckier until the effects of your pervious visit wears off. |
| Idol of Fortune | 
|
Provides +1 morale for the next battle that the hero fights. | A lost civilization created this Idol of Fortune. Not much is known about that ancient society, but everyone knows a simple touch of the Idol will improve your day.
If visited after gaining the bonus: You touch the Idol of Fortune, but you don't feel any different from before. Come back after your next battle. |
| Learning stone | 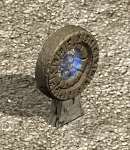
|
Gives 1000 experience to a visiting hero. Can be visited once per hero. | The mystical powers of the Learning Stone are still unknown, but a hero who stares into its surface benefits from the experience of those who have visited it in the past. [Hero] learns much from the brief moment she looks at the Stone.
If visited after gaining the bonus: Unfortunately, the powers of a Learning Stone can only be used once, and you have already visited this one. |
| Magic well | 
|
Restores the hero's spell points to the maximum amount. | |
| Mercenary camp | 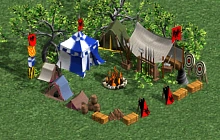
|
Grants a one-time bonus of +3 to the speed skill of visiting heroes. | [Hero] drills with some of the new mercenaries and learns that these men stress fast reflexes over strength. After some extensive lessons, his/her combat speed improves.
If visited after gaining the bonus: The mercenaries welcome you back to their camp, but they explain that there is nothing more you can learn from them. |
| Tree of Knowledge | 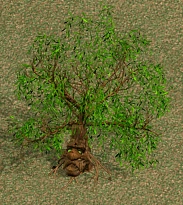
|
Provides an extra level for any hero that visits it, for either 2500 gold or 5 gems. | The branches of this massive, ancient tree sway back and forth even though there is no wind. And then you hear a disembodied voice say, "If you have come for the knowledge of the tree, place [amount resources] in the ground beneath me!
After paying: You bury [amount resources] among the roots of the Tree of Knowledge and immediately advance a level!" |
| Witch's hut | 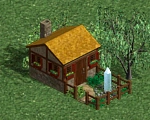
|
Heroes can visit the hut to learn a magic secondary skill. | You sit down with the crone who lives in this Witch's Hut, giving her a few moments of your time. She is so pleased to have someone to talk to that she gives you a tiny vial. "Drink it!" she tells you. "That little potion will teach you [magic skill].
After confirming: You know you shouldn't be drinking potions from a strange witch, but you throw caution to the wind and gulp down the entire vial. Suddenly, you are skilled in [magic skill]. If hero already knows the skill: You drink the crone's potion and cringe at its bitter aftertaste. "Oh, my!" says the old woman. "You can't learn [magic skill] twice. Too bad! |
| Sacred Fountain | The hero gains +3 spell points. | [Hero] takes a sip from the Sacred Fountain's cool water, and his/her spell points immediately increase.
If visited after gaining the bonus: A hero can only benefit from a Sacred Fountain once, and you have already visited this one. | |
| Training Grounds | The hero gains +3 attack. | The Training Master calls [hero] out in front of everyone for a sparring match. By the time the match is over, [hero] has learned a few things about combat as well as gained a few new bruises.
If visited after gaining the bonus: The Training Master turns you away because you have already studied at this location. It's time to let others benefit from his experience. | |
| Dream Teacher | Gives 500 experience to a visiting hero. Can be visited once per hero. | [Hero] sits beneath the giant rat head of the Dream Teacher, closes his/her eyes, and suddenly finds herself inside a room with bookshelves lining every wall. There are no doors! For what seems like days, a cloaked figure reveals the secrets of those many books. Then [hero] wakes to find only a few seconds have passed!
If visited after gaining the bonus: You sit beneath the Dream Teacher but you are unable to fall asleep. Prehaps you have already learned all that it can teach. | |
| Spring of Speed | Grants a temporary bonus of +2 to the speed skill of visiting heroes. | Where does the power of this Spring of Speed come from? No one knows. But if you walk barefoot through the cool water it will increase your speed temporarily.
If visited after gaining the bonus: As you try to step into the Spring of Speed, the surface of the water suddenly becomes as solid as steel. It won't allow you in until the effects of your previous wading wears off. | |
| Pool of Power | Grants a temporary bonus of +20% damage and +20% hit points to visiting heroes. | You submerge yourself completely in the mystical waters of the Pool of Power, holding your breath for as long as you can. Its magical energy courses through your body as it grants you a temporary increase to both your damage in combat and your hit points.
If visited after gaining the bonus: The water itself squeezes you tight, drawing you beneath its surface. Just when you think you are about to drown, it throws you to the muddy banks of the Pool - a reminder not to be greedy. | |
| Fountain of Vigor | Grants a temporary bonus of +20% hit points to visiting heroes. | Some believe this fountain gathers its powers from deep within the earth. As you bathe in the surprisingly warm water, you feel it seep into your pores, giving you a temporary increase to your hit points.
If visited after gaining the bonus: No matter how many times you bathe in the Fountain of Vigor, it will not grant you any additional benefit until the original effects wear off. At least you smell good. | |
| Fountain of Strength | Grants a temporary bonus of +20% damage to visiting heroes. | It is told that a Barbarian war good once washed his wounds in this fountain. Ever since, any who drink its cool water gains a temporary increase to the damage they do in combat.
If visited after gaining the bonus: The water is refreshing, but its magic already courses through your muscles. | |
| Sapphire of Defense | Grants a one time boost of +6 defense. | You pick up the Sapphire of Defense and have enough time to wonder about its worth when its power seeps into your skin. All that is left of the gem is a lifeless gray rock. | |
| Opal of Magic | Grants a one time boost of +6 spell points. | As you admire the beauty of this Opal of Magic, a sudden flash leaves spots before your eyes. Then the Opal disappears, bestowing its power upon you! | |
| Emerald of Speed | Grants a one time boost of +2 speed. | The moment you touch the Emerald of Speed it floats out of you grasp and flies in circles around your body. Soon, it becomes a green blur, surrounding you, absorbing you! And just as quickly it disappears. | |
| Ruby of Offense | Grants a one time boost of +6 attack. | One moment you were holding the Ruby of Offense, the next it melts into a pool of hot ooze! The liquid drips between your fingers, staining your skin as it grants you its incredible power. | |
| School of Magic | Teaches one of the two magic skills for 2000 gold. | The instructors at this School of Magic believe strongly in specialization. Hence, they will only teach you one skill. You have your choice, of course, but afterwards you can never study here again. What do you want to learn?
After paying: You count out the tuition fee for [magic skill] class and someone points the way. You best hurry. Class is in session! If visited after learning a skill: The doorman at this School of Magic asks your name and immediately consults his admissions list. Finally, he shakes his head, rudely refusing to allow you inside. | |
| Magic University | Teaches up to four different magic skills for 2000 gold. | ||
| Library | Enhances one of the magic skills for 2000 gold. | The librarian quietly explains the long list of rules here at the Library. However, all that matters to you is that, for a small fee, you can study just about any magic-related topic.
After paying: You count out the tuition fee for class and someone points the way. You best hurry. Class is in session!
You convince the Librarian to show you a list of the volumes stored in this Library. Quickly, you come to realize that you have already read many of these books and you have no interest in reading the rest." | |
| School of War | Teaches one of the two might skills for 2000 gold. | At this School of War, you can train with some of the best-known heroes in the land. You study a list of faculty names, recognizing most of them. For a mere 2000 gold you could learn a new skill and later share a tankard with a famous warrior!
After paying: You count out the tuition fee for [might skill] class and someone points the way. You best hurry. Class is in session! If visited after learning a skill: One of the teaches exists the School of War as you're walking in. He stops to examine your face, and then suddenly recognition dawns on him. "You shouldn't be studying here!" he says. "There is nothing for you to learn here." | |
| War University | Teaches up to four different might skills for 2000 gold. | ||
| Veteran's Guild | Enhances one of the might skills for 2000 gold. | When a soldier or hero becomes too old to spar with the younger adventurers, they usually become members of the Veteran's Guild. But their vast knowledge isn't lost. For a fee, they can teach you how to improve one of your non-magic skills.
After paying: You pay the proper fee and sit down with one of the veterans, learning much in a short time. If visited after the enhancement: It's fun talking to the old heroes about their incredible (and certainly exaggerated) accomplishments, but tall tales are about the only thing you can learn here." | |
| Beastmaster's Hut | Heroes can visit the hut to learn a [might skill]. | The old Beastmaster presents to you a crude bowl filled with huge, coppery beetles. "Those are magical war beetles!" he says "Very rare. Very potent. If you eat one, you will learn [might skill]." Who will eat the beetles?
After confirming: Since you've never tasted beetle before, you plop one of the big insects in your mouth and crunch down, immediately learning [might skill] If hero already knows the skill: The old Beastmaster presents to you a crude bowl to you filled with huge, coppery beetles. "Those are magical war beetles!" he says. "Very rare. Very potent. If you eat one, you will learn something about [might skill]." Fortunately, you already know [might skill], so you won't have to eat one. | |
| Altar of Tactics | Teaches a Tactics skill. One use only. | This Altar of Tactics teaches those who visit it one Tactics skill. Any who want to study here simply need to place their hands within the sparkling magic.
If there is no room for a new skill: Unexpectedly, a mystical force knocks you back from this Altar of Tactics. There is nothing for you to learn here, so do you want to destroy it? | |
| Altar of Life Magic | Teaches a Life Magic skill. One use only. | This Altar of Life Magic teaches those who visit it one Life Magic skill. Any who want to study here simply need to place their hands within the sparkling magic.
If there is no room for a new skill: Unexpectedly, a mystical force knocks you back from this Altar of Life Magic. There is nothing for you to learn here, so do you want to destroy it? | |
| Altar of Combat | Teaches a Combat skill. One use only. | This Altar of Combat teaches those who visit it one Combat skill. Any who want to study here simply need to place their hands within the sparkling magic.
If there is no room for a new skill: Unexpectedly, a mystical force knocks you back from this Altar of Combat. There is nothing for you to learn here, so do you want to destroy it? | |
| Altar of Nobility | Teaches a Nobility skill. One use only. | This Altar of Nobility teaches those who visit it one Nobility skill. Any who want to study here simply need to place their hands within the sparkling magic.
If there is no room for a new skill: Unexpectedly, a mystical force knocks you back from this Altar of Nobility. There is nothing for you to learn here, so do you want to destroy it? | |
| Altar of Order Magic | Teaches an Order Magic skill. One use only. | This Altar of Order Magic teaches those who visit it one Order Magic skill. Any who want to study here simply need to place their hands within the sparkling magic.
If there is no room for a new skill: Unexpectedly, a mystical force knocks you back from this Altar of Order Magic. There is nothing for you to learn here, so do you want to destroy it? | |
| Altar of Nature Magic | Teaches a Nature Magic skill. One use only. | This Altar of Nature Magic teaches those who visit it one Nature Magic skill. Any who want to study here simply need to place their hands within the sparkling magic.
If there is no room for a new skill: Unexpectedly, a mystical force knocks you back from this Altar of Nature Magic. There is nothing for you to learn here, so do you want to destroy it? | |
| Altar of Death Magic | Teaches a Death Magic skill. One use only. | This Altar of Death Magic teaches those who visit it one Death Magic skill. Any who want to study here simply need to place their hands within the sparkling magic.
If there is no room for a new skill: Unexpectedly, a mystical force knocks you back from this Altar of Death Magic. There is nothing for you to learn here, so do you want to destroy it? | |
| Altar of Scouting | Teaches a Scouting skill. One use only. | This Altar of Scouting teaches those who visit it one Scouting skill. Any who want to study here simply need to place their hands within the sparkling magic.
If there is no room for a new skill: Unexpectedly, a mystical force knocks you back from this Altar of Scouting. There is nothing for you to learn here, so do you want to destroy it? | |
| Altar of Chaos Magic | Teaches a Chaos Magic skill. One use only. | This Altar of Chaos Magic teaches those who visit it one Chaos Magic skill. Any who want to study here simply need to place their hands within the sparkling magic.
If there is no room for a new skill: Unexpectedly, a mystical force knocks you back from this Altar of Chaos Magic. There is nothing for you to learn here, so do you want to destroy it? | |
| Clover Field | Provides +1 luck for the next battle that the hero fights. | You wander upon a Clover Field. Soon, you realize that every clover in this field has four leaves. How incredible! Knowing that some of its luck will rub off on you, you pluck one of the clovers and tuck it safely under your belt.
If visited after gaining the bonus: How many four-leafed clovers do you need? They wouldn't make you any luckier even if you had a thousand of them tucked into your clothes. Come back again after your next battle. | |
| Fountain of Youth | Provides +1 morale for the next battle that the hero fights. | The Fountain of Youth may be a misleading name. It doesn't actually make a person younger, but it does make them feel optimistic and confident in every action they take.
If visited after gaining the bonus: There is only so much a person can gain from the Fountain of Youth. Come back when its effects wear off. | |
| Blessing Stone | Provides +1 morale and +1 luck for the next battle that the hero fights. | Primitive warriors used to kiss this weathered statue before going into because they believed the Blessing Stone granted them luck and courage in their next battle. So, you walk right up to the worn rock and give it a big smooch!
If visited after gaining the bonus: Do you enjoy kissing rocks that much? The effects from the last time you kissed the Blessing Stone still haven't worn off. | |
| Rainbow | Provides +2 luck for the next battle that the hero fights. | Sure, everyone has seen a Rainbow, but few actually find the spot where it begins. This must be your lucky day!
If visited after gaining the bonus: The Rainbow is beautiful to look at, but that's about all you can do right now because you have already visited this one. | |
| Temple of Life | Provides +2 morale to Life aligned units, and +1 morale to Order and Nature aligned units. | If visited by Life, Order or Nature units:
You approach the Temple of Life with solemn reverence and kneel before it. As you begin praying you feel a presence watching over you, removing all your fears and doubts. If visited by Might, Death and Chaos units: Upon entering this Temple of Life, you are momentarily stunned by a blinding light. A smothering warmth envelops your body, so you bolt back outside before that self-righteous goodness overpowers you. | |
| Temple of Order | Provides +2 morale to Order aligned units, and +1 morale to Life and Death aligned units. | If visited by Order, Life or Death units:
Of course, there are papers to be signed first, but the priests of this Temple of Order agree to allow you exactly fifteen minutes of prayer. That should be enough time for you to gain the benefits this Temple has to offer.
So sterile! It's as if the architect of this Temple of Order took great pains to ensure that this structure had no personality whatsoever. You're afraid that if you enter it, you will become as rigid and bland as those who pray here. | |
| Temple of Nature | Provides +2 morale to Nature aligned units, and +1 morale to Life and Chaos aligned units. | If visited by Nature, Life or Chaos units:
You catch the smell of jasmine and lavender as you enter the Temple of Nature. Hummingbirds flit above you, and a family of rabbits hop by your feet. You drop to one knee, scroop up a handful of rich soil, and pray for the courage of a bear.
The unkempt wilderness of this Temple of Nature resembles a campground more than a place of worship. There are no sacred artifacts here - in fact, nothing at all but dirt, rocks, and foul-smelling plants. You wonder why would anyone would pray in such a mundane place as you kick a pesky bunny out of your way. | |
| Temple of Death | Provides +2 morale to Death aligned units, and +1 morale to Order and Chaos aligned units. | If visited by Death, Order or Chaos units:
You leave your offering at the door and enter the Temple of Death. Inside, you are swallowed by darkness and the stench of rotting flesh. The dark power of this place feeds on you, drinking in your energy. And in return it promises that you will win your next battle. Of course, it could be lying but you won't know until it is too late.
You can barely stand to look upon the foul ediface of this Temple of Death without retching. What depraved soul could worship at such an unholy place? If only you could cleanse the world of such atrocities. | |
| Temple of Chaos | Provides +2 morale to Chaos aligned units, and +1 morale to Nature and Death aligned units. | If visited by Chaos, Nature or Death units:
No one maintains this Temple of Chaos, but then no priest is needed either. Here, you worship in whatever way you want. You can set the altar on fire or paint your name in blood on the wall. There are no rules, and you find such freedom empowering.
As you cautiously enter the unstable structure that passes for the Temple of Chaos, you wonder how anyone can possibly pray here. There's so much filth on the floors you can barely walk. And what's that on the altar, scorch marks? You quickly leave before the walls come crashing down around you or some madman decides to use you as a sacrifice. |
Creature banks[]
 |
This section is incomplete and requires more information. Please help and contribute your knowledge by editing or expanding it. |
Creature dwellings[]
| Name | Image | Description | Flavour Text |
|---|---|---|---|
| Squire's Guild | Recruit Squires. | ||
| Archery Range | Recruit Crossbowmen. | ||
| Hovel | Recruit Peasants. | ||
| Guardhouse | Recruit Pikemen. | You can recruit pikemen from this Guardhouse, however, there are [amount] pikemen guarding it. Do you wish to fight them? | |
| Ballista Works | Recruit Ballistae. | You can recruit ballistae from this Ballista Works, however, there are [amount] ballistae guarding it. Do you wish to fight them? | |
| Barracks | Recruit Crusaders. | You can recruit crusaders from this Barracks, however, there are [amount] crusaders guarding it. Do you wish to fight them? | |
| Monastery | Recruit Monks. | You can recruit monks from this Monastery, however, there are [amount] monks guarding it. Do you wish to fight them? | |
| Knight's Chapter | Recruit Champions. | You can recruit champions from this Knight's Chapter, however, there are [amount] champions guarding it. Do you wish to fight them? | |
| Altar of Light | Recruit Angels. | You can recruit angels from this Altar of Light, however, there are [amount] angels guarding it. Do you wish to fight them? | |
| Siege Workshop | Recruit Catapults. | You can recruit catapults from this Siege Workshop, however, there are [amount] catapults guarding it. Do you wish to fight them? | |
| Longhouse | Recruit Berserkers. | ||
| Centaur Stables | Recruit Centaurs. | ||
| Nomad Tents | Recruit Nomads. | You can recruit nomads from this Nomad Tents, however, there are [amount] nomads guarding it. Do you wish to fight them? | |
| Harpy Peak | Recruit Harpies. | You can recruit harpies from this Harpy Peak, however, there are [amount] harpies guarding it. Do you wish to fight them? | |
| Ogre Fort | Recruit Ogre Magi. | You can recruit ogre magi from this Ogre Fort, however, there are [amount] ogre magi guarding it. Do you wish to fight them? | |
| Cyclops Cave | Recruit Cyclopes. | You can recruit cyclopes from this Cyclops Cave, however, there are [amount] cyclopes guarding it. Do you wish to fight them? | |
| Cliff Nest | Recruit Thunderbirds. | You can recruit thunderbirds from this Cliff Nest, however, there are [amount] thunderbirds guarding it. Do you wish to fight them? | |
| Behemoth Crag | Recruit Behemoths. | You can recruit behemoths from this Behemoth Crag, however, there are [amount] behemoths guarding it. Do you wish to fight them? | |
| Beast Pen | Recruit Frenzied Gnashers. | You can recruit frenzied gnashers from this Beast Pen, however, there are [amount] frenzied gnashers guarding it. Do you wish to fight them? | |
| Dwarven Mines | Recruit Dwarves. | ||
| Halfling Burrow | Recruit Halflings. | ||
| Golem Factory | Recruit Gold Golems. | You can recruit gold golems from this Golem Factory, however, there are [amount] gold golems guarding it. Do you wish to fight them? | |
| Mage Tower | Recruit Magi. | You can recruit magi from this Mage Tower, however, there are [amount] magi guarding it. Do you wish to fight them? | |
| Golden Pavilion | Recruit Nagas. | You can recruit nagas from this Golden Pavilion, however, there are [amount] nagas guarding it. Do you wish to fight them? | |
| Altar of Wishes | Recruit Genies. | You can recruit genies from this Altar of Wishes, however, there are [amount] genies guarding it. Do you wish to fight them? | |
| Dragon Factory | Recruit Dragon Golems. | You can recruit dragon golems from this Dragon Factory, however, there are [amount] dragon golems guarding it. Do you wish to fight them? | |
| Cloud Castle | Recruit Titans. | You can recruit titans from this Cloud Castle, however, there are [amount] titans guarding it. Do you wish to fight them? | |
| Ward of Sorcery | Recruit Evil Sorceresses. | You can recruit evil sorceresses from this Ward of Sorcery, however, there are [amount] evil sorceresses guarding it. Do you wish to fight them? | |
| Wolf Den | Recruit Wolves. | ||
| Fae Trees | Recruit Sprites. | ||
| Magic Rainbow | Recruit Leprechauns. | ||
| Tiger Den | Recruit White Tigers. | You can recruit white tigers from this Tiger Den, however, there are [amount] white tigers guarding it. Do you wish to fight them? | |
| Treetop Lodge | Recruit Elves. | You can recruit elves from this Treetop Lodge, however, there are [amount] elves guarding it. Do you wish to fight them? | |
| Wine Keg | Recruit Satyrs. | You can recruit satyrs from this Wine Keg, however, there are [amount] satyrs guarding it. Do you wish to fight them? | |
| Griffin Cliffs | Recruit Griffins. | You can recruit griffins from this Griffin Cliffs, however, there are [amount] griffins guarding it. Do you wish to fight them? | |
| Unicorn Glade | Recruit Unicorns. | You can recruit unicorns from this Unicorn Glade, however, there are [amount] unicorns guarding it. Do you wish to fight them? | |
| Air Portal | Recruit Air Elementals. | You can recruit air elementals from this Air Portal, however, there are [amount] air elementals guarding it. Do you wish to fight them? | |
| Earth Portal | Recruit Earth Elementals. | You can recruit earth elementals from this Earth Portal, however, there are [amount] earth elementals guarding it. Do you wish to fight them? | |
| Fire Portal | Recruit Fire Elementals. | You can recruit fire elementals from this Fire Portal, however, there are [amount] fire elementals guarding it. Do you wish to fight them? | |
| Water Portal | Recruit Water Elementals. | You can recruit water elementals from this Water Portal, however, there are [amount] water elementals guarding it. Do you wish to fight them? | |
| Hothouse | Recruit Waspworts. | You can recruit waspworts from this Hothouse, however, there are [amount] waspworts guarding it. Do you wish to fight them? | |
| Pyre | Recruit Phoenixes. | You can recruit phoenixes from this Pyre, however, there are [amount] phoenixes guarding it. Do you wish to fight them? | |
| Magic Forest | Recruit Faerie Dragons. | You can recruit faerie dragons from this Magic Forest, however, there are [amount] faerie dragons guarding it. Do you wish to fight them? | |
| Mantis Nest | Recruit Mantises. | You can recruit mantises from this Mantis Nest, however, there are [amount] mantises guarding it. Do you wish to fight them? | |
| Gargantuan Dell | Recruit Mantises. | You can recruit gargantuans from this Gargantuan Dell, however, there are [amount] gargantuans guarding it. Do you wish to fight them? | |
| Cemetery | Recruit Skeletons. | ||
| Torture Chamber | Recruit Imps. | ||
| Desecrated Grave | Recruit Zombies. | ||
| Barrow Mound | Recruit Ghosts. | You can recruit ghosts from this Barrow Mound, however, there are [amount] ghosts guarding it. Do you wish to fight them? | |
| Kennels | Recruit Cerberi. | You can recruit cerberi from this Kennels, however, there are [amount] cerberi guarding it. Do you wish to fight them? | |
| Parapet | Recruit Gargoyles. | You can recruit gargoyles from this Parapet, however, there are [amount] gargoyles guarding it. Do you wish to fight them? | |
| Embalmer's Lab | Recruit Mummies. | You can recruit mummies from this Embalmer's Lab, however, there are [amount] mummies guarding it. Do you wish to fight them? | |
| Mansion | Recruit Vampires. | You can recruit vampires from this Mansion, however, there are [amount] vampires guarding it. Do you wish to fight them? | |
| Spawning Pit | Recruit Venom Spawn. | You can recruit venom spawn from this Spawning Pit, however, there are [amount] venom spawn guarding it. Do you wish to fight them? | |
| Ice Gate | Recruit Ice Demons. | You can recruit ice demons from this Ice Gate, however, there are [amount] ice demons guarding it. Do you wish to fight them? | |
| Dragon Graveyard | Recruit Bone Dragons. | You can recruit bone dragons from this Dragon Graveyard, however, there are [amount] bone dragons guarding it. Do you wish to fight them? | |
| Temple of the Damned | Recruit Devils. | You can recruit devils from this Temple of the Damned, however, there are [amount] devils guarding it. Do you wish to fight them? | |
| Dark Knight's Sanctum | Recruit Dark Champions. | You can recruit dark champions from this Dark Knight's Sanctum, however, there are [amount] dark champions guarding it. Do you wish to fight them? | |
| Den of Thieves | Recruit Bandits. | ||
| Orc Towers | Recruit Orcs. | ||
| Warren | Recruit Troglodytes. | ||
| Statuary Garden | Recruit Medusas. | You can recruit medusas from this Statuary Garden, however, there are [amount] medusas guarding it. Do you wish to fight them? | |
| Labyrinth | Recruit Minotaurs. | You can recruit minotaurs from this Labyrinth, however, there are [amount] minotaurs guarding it. Do you wish to fight them? | |
| Pillar of Eyes | Recruit Evil Eyes. | You can recruit evil eyes from this Pillar of Eyes, however, there are [amount] evil eyes guarding it. Do you wish to fight them? | |
| Troll Cave | Recruit Trolls. | You can recruit trolls from this Troll Cave, however, there are [amount] trolls guarding it. Do you wish to fight them? | |
| Black Wood | Recruit Nightmares. | You can recruit nightmares from this Black Wood, however, there are [amount] nightmares guarding it. Do you wish to fight them? | |
| Volcanic Vent | Recruit Efreeti. | You can recruit efreeti from this Volcanic Vent, however, there are [amount] efreeti guarding it. Do you wish to fight them? | |
| Goblin Armory | Recruit Goblin Knights. | You can recruit goblin knights from this Goblin Armory, however, there are [amount] goblin knights guarding it. Do you wish to fight them? | |
| Hydra Pond | Recruit Hydras. | You can recruit hydras from this Hydra Pond, however, there are [amount] hydras guarding it. Do you wish to fight them? | |
| Dragon Cave | Recruit Black Dragons. | You can recruit black dragons from this Dragon Cave, however, there are [amount] black dragons guarding it. Do you wish to fight them? |
Mines[]
| Name | Image | Description | Flavour Text |
|---|---|---|---|
| Cinnabar Deposit | Can be turned into a Alchemist's Lab after paying. | Before paying:
This is a large deposit of cinnabar, but without the proper equipment you will not be able to reap the benefits of these resources. For 5000 gold you could build an Alchemist's Lab here. Do you wish to build it now? After paying: After paying the construction workers, you now have a working Alchemist's Lab that will provide you with 1 mercury per day. | |
| Alchemist's lab | 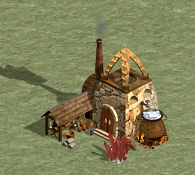
|
Provides 1 mercury per day. | Now, you have an Alchemist's Lab under your control. It will provide you with 1 mercury per day. |
| Abandoned Alchemist's Lab | Can be turned into a working Alchemist's Lab after battle. | Before battle:
This Abandoned Alchemist's Lab is guarded by [enemy amount]. Do you wish to fight them to gain control of it? After battle: You have defeated [enemy amount]. Now, the Abandoned Alchemist's Lab will provide you with 1 mercury per day. | |
| Crystal Vein | Can be turned into a Crystal Mine after paying. | Before paying:
This is a large deposit of crystals, but without the proper equipment you will not be able to reap the benefits of these resources. For 4000 gold and 10 wood you could build a Crystal Mine here. Do you wish to build it now? After paying: After paying the construction workers, you now have a working Crystal Mine that will provide you with 1 crystal per day. | |
| Crystal mine | 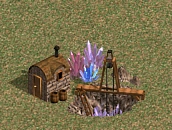
|
Provides 1 crystal per day. | This Crystal Mine is now under your control, providing you with 1 crystal per day. |
| Abandoned Crystal Mine | Can be turned into a working Alchemist's Lab after battle. | Before battle:
This Abandoned Crystal Mine is guarded by [enemy amount]. Do you wish to fight them to gain control of it? After battle: You have defeated [enemy amount]. Now, the Abandoned Crystal Mine will provide you with 1 crystal per day. | |
| Gem Vein | Can be turned into a Gem Mine after paying. | Before paying:
This is a large deposit of gems, but without the proper equipment you will not be able to reap the benefits of these resources. For 4000 gold and 10 wood you could build a Gem Mine here. Do you wish to build it now? After paying: After paying the construction workers, you now have a working Gem Mine that will provide you with 1 gems per day. | |
| Gem mine | 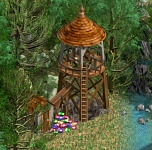
|
Provides 1 gem per day. | This Gem Mine is now under your control, providing you with 1 gems per day. |
| Abandoned Gem Mine | Can be turned into a working Gem Mine after battle. | Before battle:
This Abandoned Gem Mine is guarded by [enemy amount]. Do you wish to fight them to gain control of it? After battle: You have defeated [enemy amount]. Now, the Abandoned Gem Mine will provide you with 1 gems per day. | |
| Gold Vein | Can be turned into a Gold Mine after paying. | Before paying:
This is a large deposit of gold, but without the proper equipment you will not be able to reap the benefits of these resources. For 15000 gold, 20 wood and 20 ore you can build a Gold Mine here. Do you wish to build it now? After paying: After paying the construction workers, you now have a working Gold Mine that will provide you with 1000 gold per day. | |
| Gold mine | 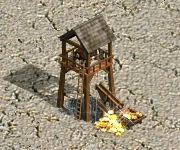
|
Provides 1000 gold per day. | This Gold Mine is now under your control, providing you with 1000 gold per day. |
| Abandoned Gold Mine | Can be turned into a working Gold Mine after battle. | Before battle:
This Abandoned Gold Mine is guarded by [enemy amount]. Do you wish to fight them to gain control of it? After battle: You have defeated [enemy amount]. Now, the Abandoned Gold Mine will provide you with 1000 gold per day. | |
| Ore Deposit | Can be turned into a Ore Pit after paying. | Before paying:
This is a large deposit of ore, but without the proper equipment you will not be able to reap the benefits of these resources. For [resource amount] you can build an Ore Pit here. Do you wish to build it now? After paying: After paying the construction workers, you now have a working Ore Pit that will provide you with 2 ore per day. | |
| Ore Pit | 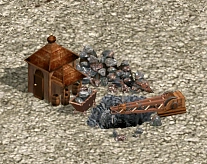
|
Provides 2 ore per day. | Now, you have an Ore Pit under your control. It will provide you with 2 ore per day. |
| Abandoned Ore Pit | Can be turned into a working Ore Pit after battle. | Before battle:
The Abandoned Ore Pit is guarded by [enemy amount]. Do you wish to fight them to gain control of it? After battle: You have defeated [enemy amount]. Now, the Abandoned Ore Pit will provide you with 2 ore per day. | |
| Wood Pile | Can be turned into a Sawmill after paying. | Before paying:
There is a large deposit of wood, but without the proper equipment you cannot reap the benefits of these resources. For 2500 you can build a Sawmill. Do you wish to build it now? After paying: After paying the construction workers, you now have a working Sawmill that will provide you with 2 wood per day. | |
| Sawmill | 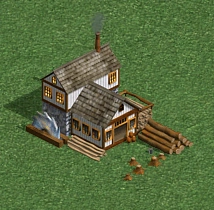
|
Provides 2 wood per day. | This Sawmill is now under your control, providing you with 2 wood per day. |
| Abandoned Sawmill | Can be turned into a working Sawmill after battle. | Before battle:
The Abandoned Sawmill is guarded by [enemy amount]. Do you wish to fight them to gain control of it? After battle: You have defeated [enemy amount]. Now, the Abandoned Sawmill will provide you with 2 wood per day. | |
| Sulfur Vein | Can be turned into a Sulfur Mine after paying. | Before paying:
This is a large deposit of sulfur, but without the proper equipment you cannot reap the benefits of these resources. For 4000 and 10 wood you could build a Sulfur Mine here. Do you wish to build it now? After paying: After paying the construction workers, you now have a working Sulfur Mine that will provide you with 1 sulfur per day. | |
| Sulfur mine | 
|
Provides 1 sulfur per day. | This Sulfur Mine is now under your control, providing you with 1 sulfur per day. |
| Abandoned Sulfur Mine | Can be turned into a working Sulfur Mine after battle. | Before battle:
This Abandoned Sulfur Mine is guarded by [enemy amount]. Do you wish to fight them to gain control of it? After battle: You have defeated [enemy amount]. Now, the Abandoned Sulfur Mine will provide you with 2 sulfur per day. | |
| Miner's Guild | Provides either gold or ore each week | The instructors at this Miner's Guild agree to provide you with any resources their students dig up during their training. They give you [resource amount] right now and promise an additional 500 gold or 10 ore every week.
After capturing enemy's one: Unfortunately, the instructors at this Miner's Guild inform you that they have nothing to spare at this time, but in the future they promise to send you 500 gold or 10 ore each week. | |
| Woodcutter's Cottage | Provides either gold or wood each week | After a long conversation, the woodcutter decides you would make a great partner. He gives you [resource amount] now, and says he will gladly supply you with 500 gold or 10 wood every week in return for your support.
After capturing enemy's one: The woodcutter will send you 500 gold or 10 wood each week, but right now he doesn't have any on hand. | |
| Apprentice's Lab | Provides either gold or mercury each week | A large explosion shakes the ground beneath your feet. As you step inside the Apprentice's Lab, you find several of the students brushing soot from their clothes. For your promise to keep this disaster from their instructors, they give you [resource amount] and agree to provide you with 500 gold or 5 mercury per week.
After capturing enemy's one: The helpful apprentices studying at this Lab agree to give you 500 gold or 5 mercury every week, but they seem to be running short right now. You will have to wait. | |
| Crystal Pool | Provides either gold or crystal each week | Crystals seem to grow right out of the water of this beautiful Crystal Pool. You collect [resource amount] right now and estimate that pool will yield another 500 gold or 5 crystals per week.
After capturing enemy's one: This lovely Crystal Pool will provide you with 500 gold or 5 crystals each week, but right now there is nothing to collect. | |
| Imp Pit | Provides either gold or sulphur each week | It is simple to intimidate the imps who live here into giving you [resource amount]. They will also provide you with 500 gold or 5 sulphur each week.
After capturing enemy's one: The jabbering imps would happily provide you with 500 gold or 5 sulfur every week, but they seem to have lost their supply. You'll have to wait until next week. | |
| Leprechaun | Provides either gold or gems each week | In a challenging game of wits, you trick the Leprechaun into giving you [resource amount]. To your surprise, he is so impressed with your cleverness that he says he will give you an additional 500 gold or 5 gems every week.
After capturing enemy's one: You beat the Leprechaun in a game of dice, but he can't pay up at the moment. The Leprechaun is so embarrassed that he promises to send you 500 gold or 5 gems every week. | |
| Water Wheel | Provides gold each week | In return for your protection, the miller grudgingly agrees to provide you with 1000 gold every week.
After capturing enemy's one: In return for your protection, the miller will send you 1000 gold each week. Unfortunately, he doesn't have enough gold right now. | |
| Windmill | Provides random resource each week | Since these are such dangerous times, the miller gives you [resource amount] now in exchange for your protection, and he promises to give you as much as he can afford every week.
After capturing enemy's one: Someone has already visited the miller, but in exchange for your protection he promises to give you what he can in the future. |
Traveling and Miscellaneous[]
| Name | Image | Description |
|---|---|---|
| Prison | 
|
The prison holds a hero that will join the side of anyone who frees them. |
| Redwood tree | 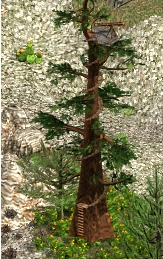
|
This structure removes the fog of war in a big circle around itself when visited by a hero. |
| Shipyard | 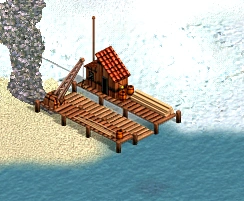
|
A visiting hero can purchase ships here. The cost is 1000 gold and 10 wood per ship. |
| Tunnel | 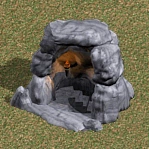
|
It is used to travel between the surface and the underground. |
Treasures[]
| Name | Image | Description |
|---|---|---|
| Campfire | 
|
The first hero to visit the campfire finds a random amount of gold and resources. The campfire can only be visited once, and then it disappears. |
| Flotsam | 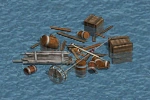
|
The first hero to visit the flotsam finds a random amount of wood and gold. The flotsam can only be visited once, and then it disappears. |